
 Shop all

What you can make
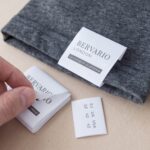
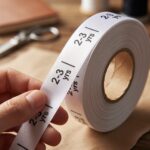
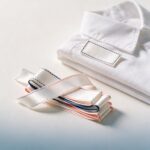
Labels to sew into clothes, blankets, bags and handmade goods: a name for school uniform, your brand for things you make, or washing instructions. They are printed in black on white polyester satin ribbon, 16 mm or 50 mm wide, and arrive as one roll: you cut the labels apart at the dashed lines and sew them in.
One colour. Everything prints in black. The designer shows your label in black and white, and a picture as pure black and white, so what you see is what you get.
Before you start
- All you need is a web browser, on a computer or a phone. There is nothing to install.
- You do not need an account to design or to order. You only need one to save a design and come back to it later.
- Everything you add can be moved, changed or deleted until you approve your proof. Nothing is printed before that.
Starting your design
On the product page, press Start designing. You are asked How would you like to start?
- Pick a ready-made design, if there are any for this product, and change it to suit you.
- Design it myself opens an empty label.
- Our designers draw it for you: tell us what you want, attach your logo or examples if you have them, and we draw it. There is a design fee per design, shown on that card before you order, as its own line in your basket.
- Email us your artwork later: order now and send us your finished file afterwards. Its card tells you the file’s exact size, and your order email says where to send the file.
Finding your way around
On a computer, your label is in the middle. The list of pages runs down the side: Design, Text and the rest, ending with Ribbon. The price is at the bottom of the side panel and updates as you go. Along the top are Save, Help (this guide, in a new tab), Menu, and the undo and redo arrows.
On a phone, your label fills the screen.
- The round + button adds things: Text, Picture, Graphics, Wash care, Shape and Templates.
- The price at the top opens Ribbon.
- The bar at the bottom has Menu, Undo, Redo, Save and Finalise. Menu → Help: how to use this designer opens this guide.
- When something is selected, a button above the canvas, such as Edit text, opens its settings.
Your design: the list of everything on it
Design shows Your design: every item on your label, one per line. When it is empty, big buttons offer the ways to start.
- Click a line, or the item itself, to select it.
- The eye hides an item or shows it again. The arrows move it in front of, or behind, the others. The bin deletes it.
- Below the list, Add more gives you the same buttons again.
Adding text
- Open Text and type in the box that says Type your text.
- Choose Straight text or Curved text, a font, bold or italic, and the alignment.
- The sliders set the Size, the Curve (a dome, a cup, or flat), the Spacing between letters and the Line spacing.
- Press Add your text. There is no colour to pick: everything on the ribbon prints in black on the white satin.
To change text later, click it on your label. Its settings open again and every change shows straight away.
Pictures
Upload adds a logo or picture from your computer or phone. It is shown in pure black and white, exactly as it will print, so check it still reads well. Bold logos and simple drawings work best: very fine lines and soft shading do not survive on a narrow ribbon.
There are no QR codes on this product: printed this small on fabric, phones cannot read them reliably.
Graphics
Graphics is our library of ready-drawn pictures. Search it, or pick a category, and click one to add it. It prints in black, like everything on the ribbon.
Click a graphic on your label to change it: Swap it for another, set its size and angle, flip it, or Duplicate it.
Wash-care symbols
Wash care has the standard care symbols: washing, bleaching, drying, ironing and professional care. Click one to add it to your label; it prints in black like everything else. On the 50 mm ribbon there is room for a row of symbols with your text.
Shapes
Shapes draws a Rectangle, an Ellipse or a Polygon (choose how many Sides), with rounded Corners if you like.
Choose Solid black or Outline only, set the Thickness of the line, and press Add shape. everything on the ribbon prints in black on the white satin.
Ribbon, label length and quantity
Ribbon is this product’s own page (on a phone, tap the price at the top). The same choices are on the product page before you start.
- Ribbon width: 16 mm, the classic name tape, or 50 mm, room for a logo or care details.
- Design direction (50 mm only): Along the ribbon reads along its length like a name tape; Across the ribbon reads across it like a care label. On 16 mm the design always runs along the ribbon.
- Label length (cut length): how long each label is, from one cut line to the next. The designer shows the shortest and longest allowed.
- Label ends: Flat (cut) to sew straight through the label, or Fold both ends under for neat folded ends. With folds, set Fold at each end; the label length includes the folds, and the page tells you how much shows once it is sewn in.
- Number of labels: the ribbon is sold by the metre, so the page shows how many metres your labels make and the price as you change it. There is a smallest order, and the page tells you how many labels that is at your length.
Tip: when you are just short of a cheaper price break, the page offers more labels for the same price. A longer order never costs less than a shorter one.
Moving, resizing and layering
- Move: drag the item.
- Resize: drag a corner handle. Turn: drag the round handle.
- Centre: on a computer, the bar under your label has Centre ↕, Centre ↔ and Centre on label for the selected item.
- In front or behind: use the arrows on Design.
- Undo and redo: the curved arrows at the top (on a computer, Ctrl+Z and Ctrl+Shift+Z work too).
- Fine work: zoom in with the + and − buttons, and use Pan to move around.
The edge warning
The ribbon is printed with a clear strip along both of its long edges, which the designer marks with a red dashed line. Keep everything inside the lines.
Each label ends at a dashed cut line, where you cut the roll apart. If you fold the ends under, the fold is marked too and nothing prints in it; the warning then reads X mm into the fold. That part is folded under when the label is sewn in.
The designer checks for you. When something is too close, the side panel warns you, for example: 1 item may be trimmed — check Your design. On Design the item is marked, with a Fix it button that pulls it back into the safe area. With more than one, Fix all does them all. You can also just make the item a little smaller.
Checking it before you order
Preview shows your label full-screen, as it will be printed. It changes nothing.
Saving and coming back later
Save keeps your design under a name you choose. You need an account for this; if you are not signed in, the designer offers Register or log in, and it only takes a minute.
To open it again later: Menu → Open a saved design.
Approving your proof and ordering
- Press Finalise design (Finalise on a phone).
- Review your proof shows exactly what we will print, with the size, quantity and price. Tick Show cut line to see where it will be cut.
- Read every word. Spelling, layout and pictures are your responsibility once you approve.
- Tick the box to say you have read and agree, then press Approve & add to basket.
Approving is final. We print exactly what the proof shows, so a mistake in an approved proof cannot be refunded. If anything is wrong, go back and fix it first.
Your approval is kept with the order, so at checkout you just choose delivery and pay securely through Payfast.
After you order
- We start making your order once you have approved your proof and paid. How long it takes, and how it reaches you explains production times, Rush production, courier delivery and lockers.
- Collecting from our Wilro Park collection point is free. We email you when your order is ready to collect.
- Want to send us your own finished artwork instead? Choose Email us your artwork later where it is offered, or send us an enquiry.